Shadow Hawk SHD-2H | ||||||||||||||||||||||||||||||||||||||||||||||||||||||||||||||||||||||||||||||||||||||||||||||||||||||||||||||||||||||||||||||||||||
| ||||||||||||||||||||||||||||||||||||||||||||||||||||||||||||||||||||||||||||||||||||||||||||||||||||||||||||||||||||||||||||||||||||
| ||||||||||||||||||||||||||||||||||||||||||||||||||||||||||||||||||||||||||||||||||||||||||||||||||||||||||||||||||||||||||||||||||||
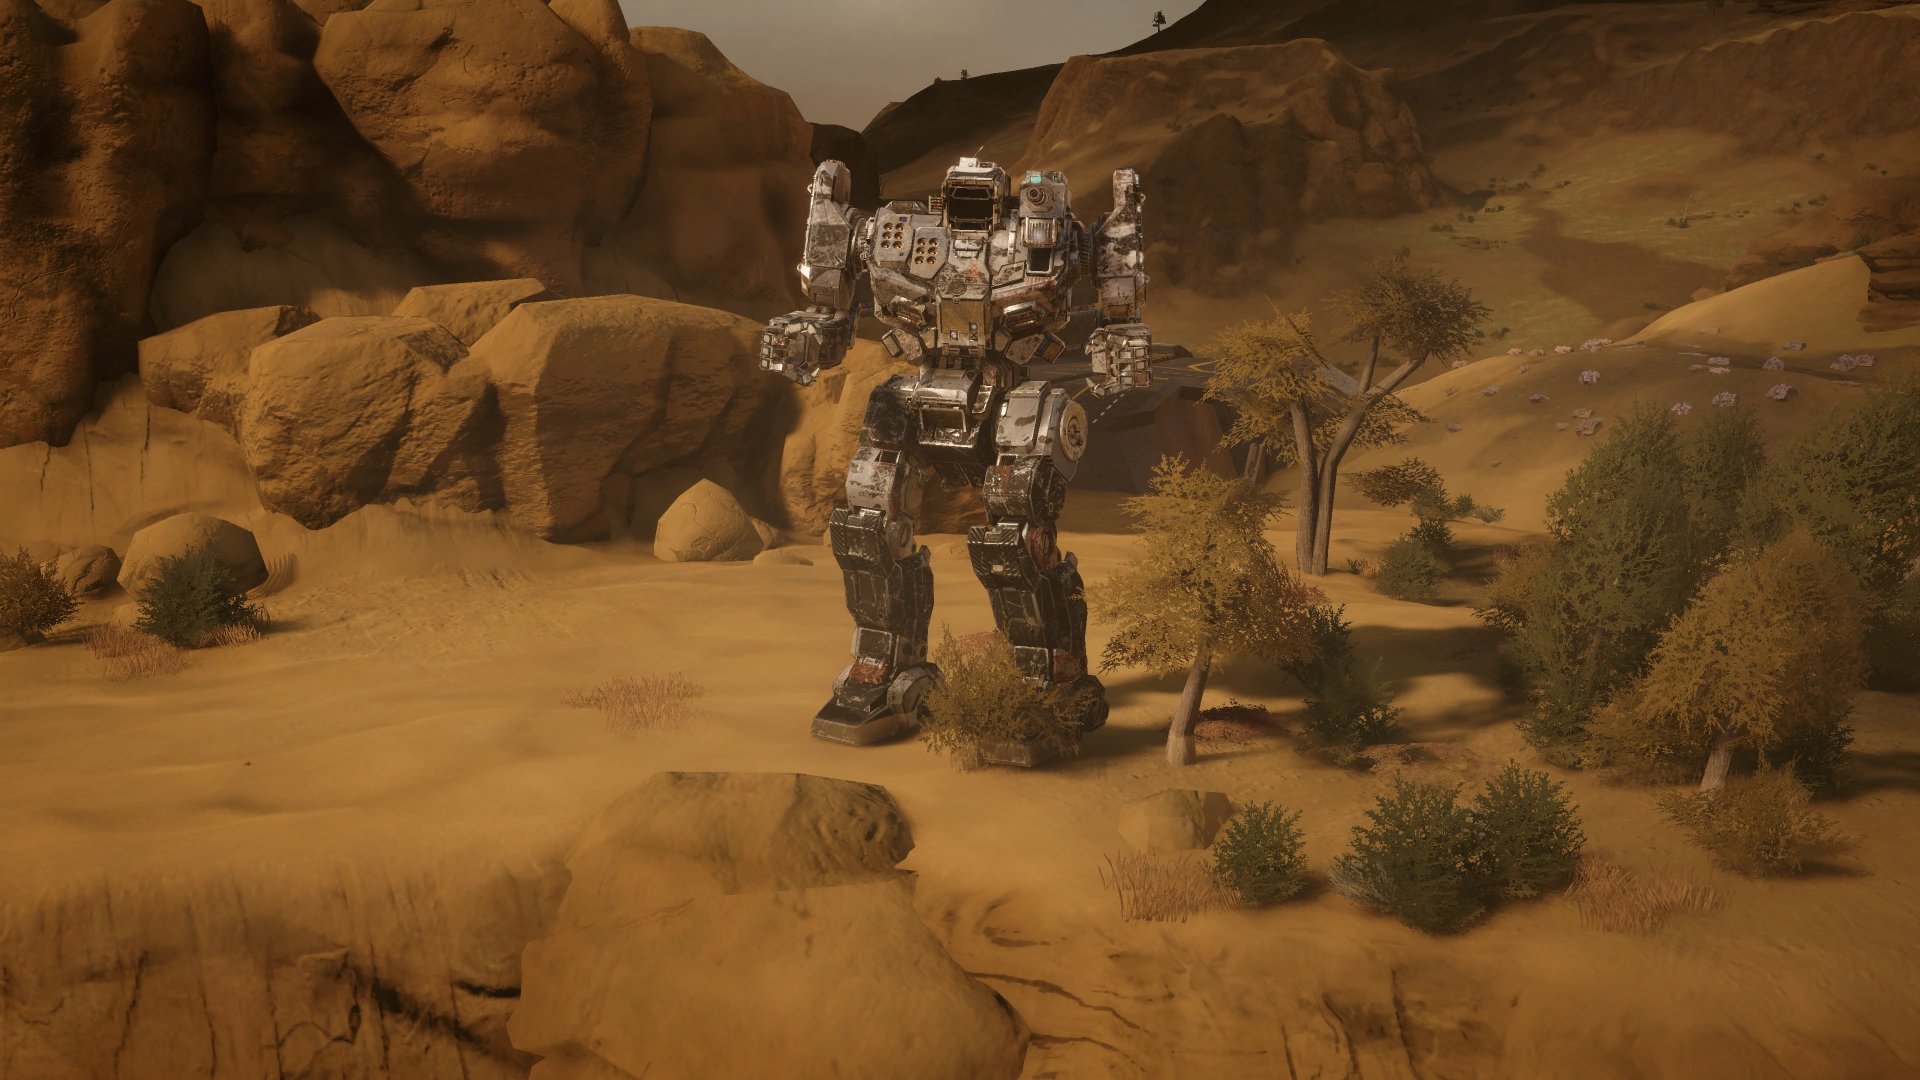
Shadow Hawk SHD-2H is a Medium-class 'Mech in Battletech.
Description
The Shadow Hawk 2H is a main-line Medium 'Mech that used across known space. It excels at nothing, but does not lack in any single area. With Jump Jets and a mix of weapons, it can keep any enemy on their toes.
Loadouts
In the early stages of the campaign the Shadow Hawk SHD-2H is extremely versatile possessing lightning speed and decent armor. However the default load out is incredibly diverse, lacking the armament to deal satisfactorily with any target. So I present the following alternate loadout.
Missile Barrage:
L. Torso: LRM Ammo
Head: LRM-5
R.Torso: LRM-10 and LRM-15
R. Arm: M-Laser, S-Laser
C. Torso: LRM Ammo X2
L.Leg: (S) Jump Jet
R.Leg: (S) Jump Jet
Ideally all of the LRM's should have the + (stb. damage) modifier. This loadout is serviceable well into mid game, or until you posses a 'mech better suited to the role. The Shadow Hawk SHD-2H is fast and well armored allowing you to keep the enemy at range while launching stability affecting volleys into their formation, forcing them to back off and entrench or risk falling over. Pair this with a fast melee 'mech or a PPC sniper and you can salvage most things you come into contact with.
- Better loadout than above is using 2 LRM15 instead of LRM10+LRM5. This reduces the heat by 3 but same dmg. Putting the LRM ammo in the center torso is dump idea since you can get ammo explosion in the one place you don't want it! Put the ammo in the legs instead and the jump jets should of course be in center torso. You want to use your jump jets when you got one of your legs destroyed I presume?
- The simplest alteration to the default configuration is to simply remove the SRMs for more armor. The Shadow Hawk's melee damage is the best of any medium mech by a significant margin, and it is mobile enough to use it.
Because the Shadow Hawk is blessed with battlefists from the optional TT ruleset, it has great melee output. Use it. It's fast, it can close in quick, act as a spotter for support LRMs which makes it a great close range brawler. Ditch the AC/5 and change the missiles to SRM6x2 in the torso and SRM4 in the head and keep the medium laser in the arm, add armor. Act as sensible spotter for rest of your lance and close in to finish off vulnerable mechs with SRMs for stability damage and melee if you need to cool off. JJ for DFA on downed mechs. Upgrade to + weapons as available.
- Alternate loadouts are rangefinders in the head (because you're a spotter first, not a damage sponge), and support weapons to add to your melee mayhem. Keep JJ if possible, they are great for DFA and getting behind mechs to fire on their backs and then melee if your lance is keep pressure up front.
- It's a great training mech for late game spotter/damage sponge/melee brawler + indirect fire support lances. Also, because it's a brawler and good SRM boat, it also makes a good training rig for Guts/Tactics mechwarriors who will be VERY important in late game when you need the initiative boost and bulwark will effectively double the armor on your assault mechs! This means the Shadow Hawk doesn't multi-target and this build doesn't suffer from it.
- Because it's a walking target, don't assign your main character to this mech otherwise the AI will really single it out.
- You can fit an AC20 and a ton of ammo on the Shadow Hawk. Close up with the enemy and take shots that are almost guaranteed to smash whatever location they hit. Works particularly well with Breaching Shot (because it's just one weapon) and Precision Strike (blow off legs for knockdown potential). Then when you run out of ammo start bashing in melee. If you also remove the jump jets then you have additional weight to use on armour, though on some maps it limits your potential to get into firing, though if you don't do it then expect this build to cost a lot of money in repairs.
Strategy
- The Shadow Hawk 2H is the perfect example of a 'jack-of-all-trades.' It supports weaponry for all ranges, has respectable speed and jump capability, and mounts decent armor. This comes at the cost of excelling at nothing in particular.